![]()
Raptor is a web-based (web-serivce + UI) github centric source-vulnerability scanner i.e. it scans a repository with just the github repo url. You can setup webhooks to ensure automated scans every-time you commit or merge a pull request. The scan is done asynchonously and the results are available only to the user who initiated the scan.
Some of the features of the Raptor:
- Plug-in architecture (plug and play external tools and generate unified reports)
- Web-service can be leveraged for custom automation (without the need of the UI)
- Easy to create/edit/delete signatures for new vulnerabilities and/or programming languages.
This tool is an attempt to help the community and start-up companies to emphasize on secure-coding. This tool may or may not match the features/quality of commercial alternatives, nothing is guaranteed and you have been warned. This tool is targeted to be used by security code-reviewers and/or developers with secure-coding experience to find vulnerability entry-points during code-audits or peer reviews. Please DO NOT trust the tool's output blindly. This is best-used if you plug Raptor into your CI/CD pipeline.
Version
0.1 beta
Tech
Integrated Plugins:
Note: Most of the following tools/modules/libs have been modified heavily to be able to integrate well in the framework.
-
⚡ Mozilla ScanJS - for JavaScript (Client-Side, Node.JS etc. and upcomming support for Chrome Extensions & Firefox Plugins) -
⚡ Brakeman - for Ruby On Rails -
⚡ RIPS - for PHP -
⚡ Manitree - for AndroidManifest.xml insecurities
Available Rulepacks:
-
⚡ ActionScript - supports Flash/Flex (ActionScript 2.0 & 3.0) source/sinks -
⚡ FindSecurityBugs (rules Only) - for Java (J2EE, JSP, Android, Scala, Groovy etc.) -
⚡ gitrob - for Sensitive Date Exposure (files containing credentials, configuration, backup, private settings etc.)
Installation (Tested on a Ubuntu 14.04 x64 LAMP instance)
Installation Video: YouTube Install
$ wget https://github.com/dpnishant/raptor/archive/master.zip -O raptor.zip$ unzip raptor.zip
$ cd raptor-master
$ sudo sh install.shUsage
Scanner
Installation Video: YouTube Usage
cd raptor-master
sudo sh start.sh #starts the backend web-service
Now point your browser to Raptor Home (http://localhost/raptor/)
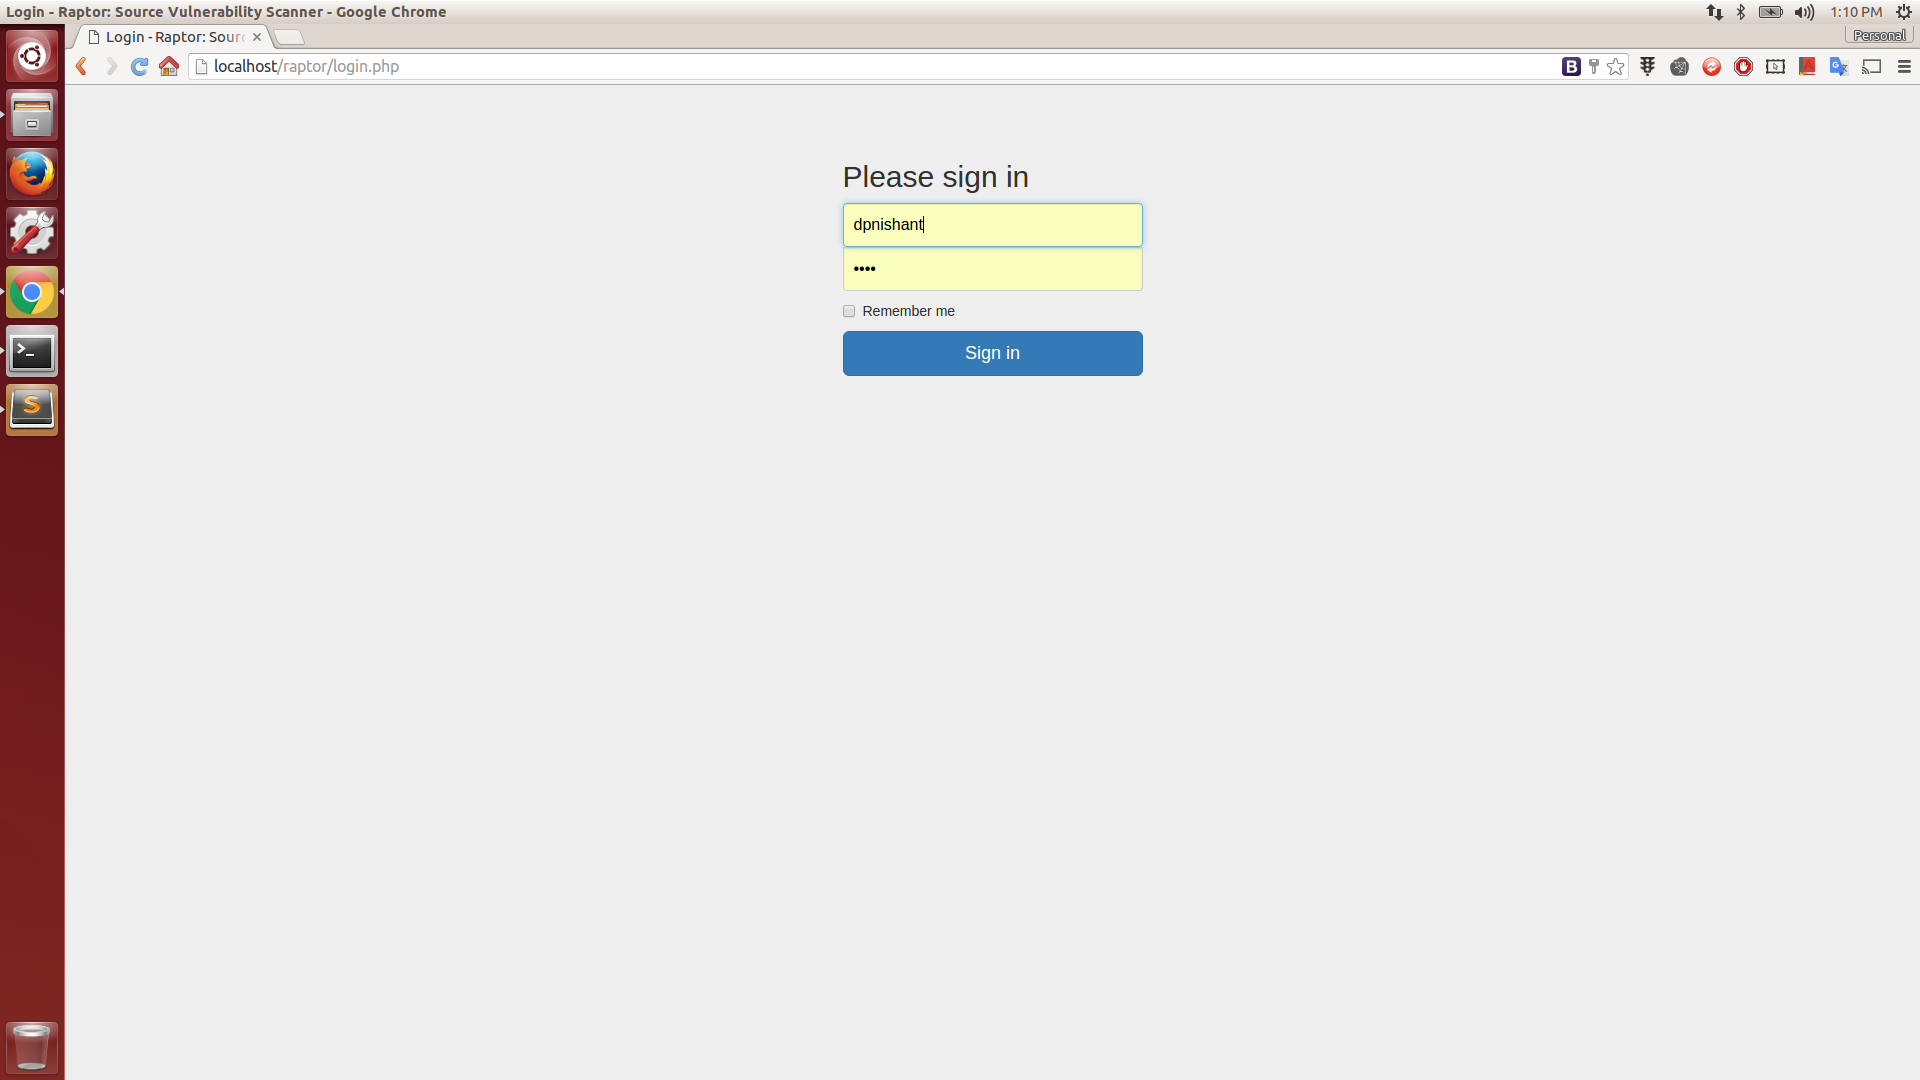
Login
Login with the username as registered on the corresponding github server you are connected to and any password (but remember the username to view scan history)
For example:
If you are registered as foobar on https://github.com, then use the same username when scanning repos on https://github.com. However if are registered as foobar_corp on your personal/corporate github (say https://github.corp.company.com) then use the same username if you intend to scan repos on https://github.corp.company.com
However, as of now password can be anything, since we have NOT implemented a database in the development version.
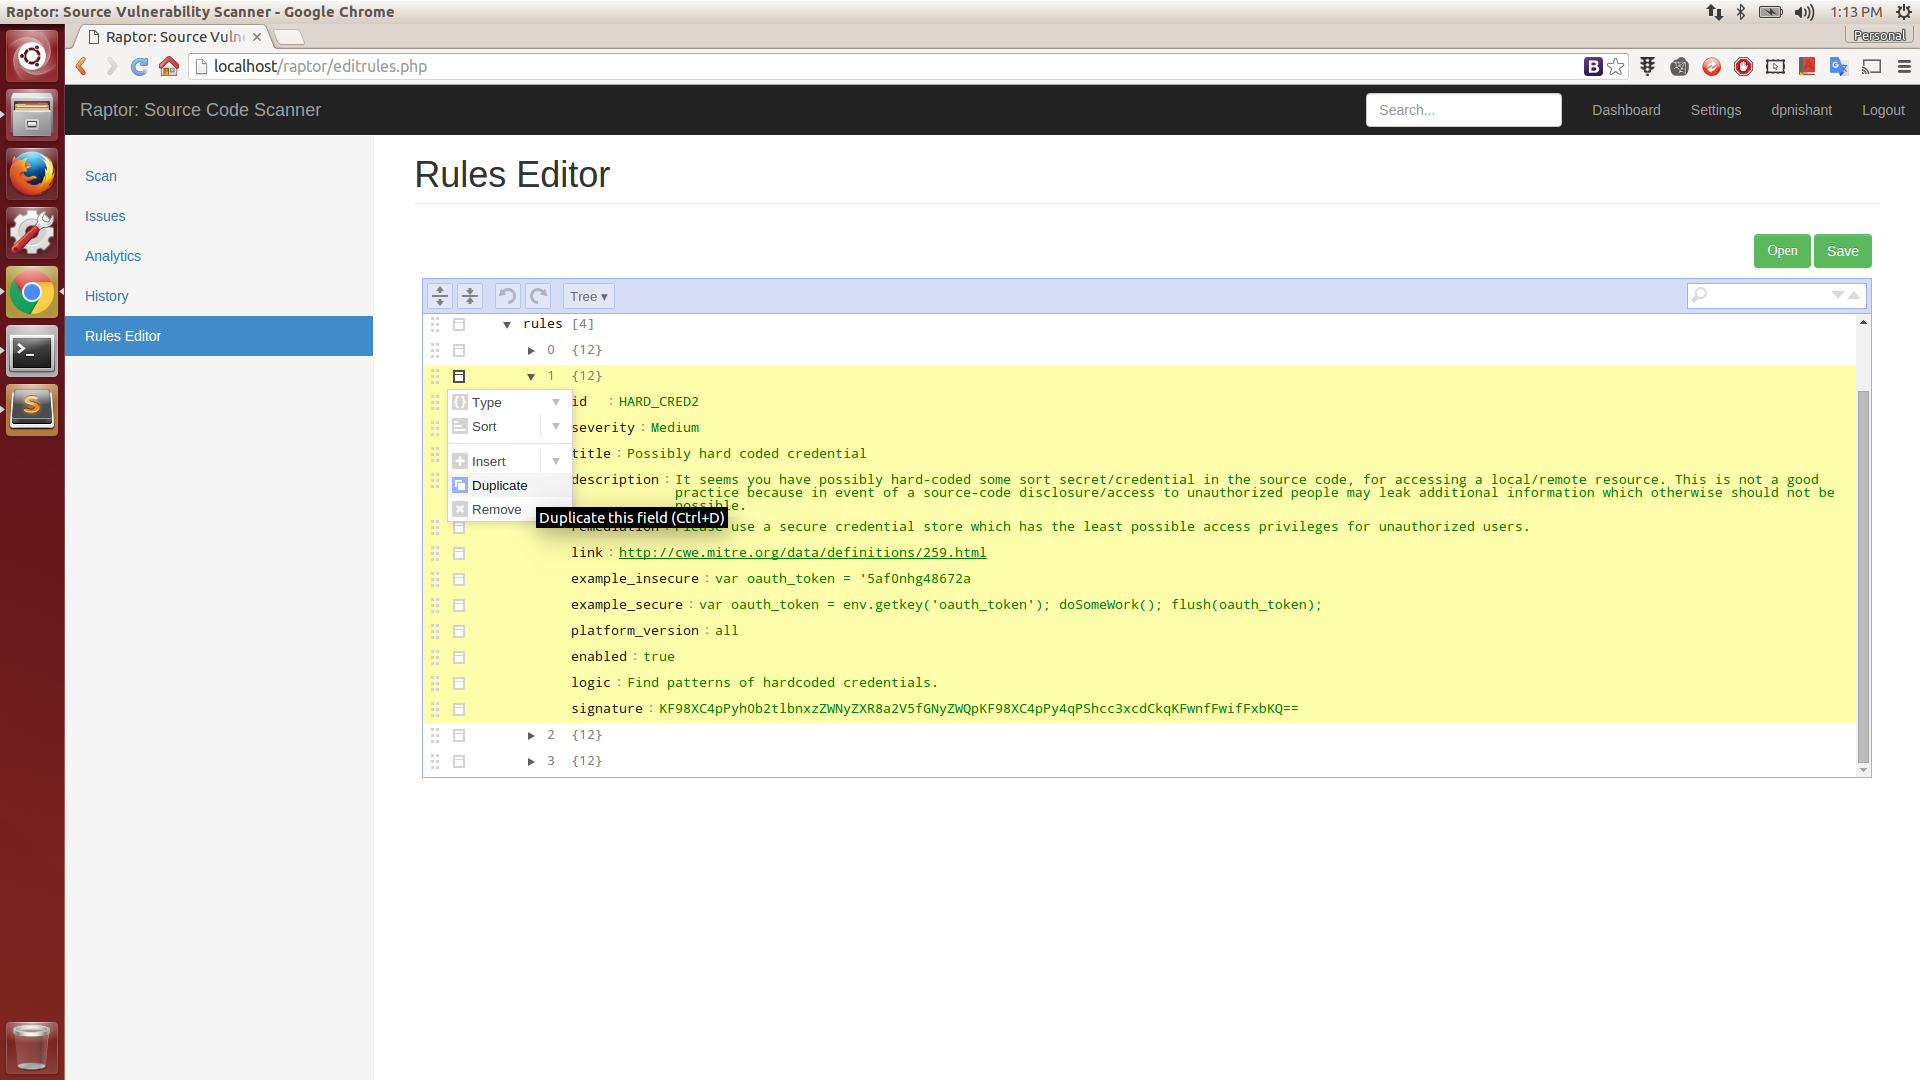
Rules Editor
You can use the bundled light-weight, GUI client-side rules editor for adding any new/custom rule(s) for your specific requirements(s) or any other plain-text editor as the rulepack files are just simple JSON structures. Use your browser to open rules located in 'backend/rules'. When you are done, save your new/modified rules file in same directory i.e. 'backend/rules'. All you need to do now is a minor edit, here: Init Script. Append your new rulepack filename to this array without the '.rulepack' extension and restart the backend server. You are all set!
You can access it here: Rules Editor (http://localhost/raptor/editrules.php)
Adding Rules
ignore_list.rulepack
Add a filename or directory name pattern to exclude from getting scanned. This is useful to ignore any known files like jquery.min.js etc. or say the entire /test/ directory. For example in the sample content below, jquery means jquery and is case-sensitive, hence be careful. In the plugins section, name of the plugin is the name of the rulepack file without the ".rulepack" extension as available under the rules/ directory. The issue field is the ID of the issue mentioned in each rule of the rulepack files: Example #1, Example #2. The match_type field value can be either regex or start or end. The value field is the exact string to be matched in case the match_type is start or end. In case the match_type field is regex the value should contain the raw RegEx pattern which needs to be Base64 encoded to avoid any JSON syntax escaping related issues. regex is a Regular Expression based matching, start will match the at the beginning of the snippet and end will match at the end of the snippet.
The way it works is when the scanner has finished scanning for issues, it will iterate through all the issues found and remove those that match the patterns (based on the type of match) of each plugin mentioned in the ignore_list.rulepack file.
(sample contents below)
{
  "files": [
    "/.",
    "bootstrap",
    "jquery",
    "uglify",
    "knockout",
    "angular",
    "backbone",
    "ember",
    "yui",
    "mocha",
    "express",
    "yql",
    "dataTables"
  ],
  "directories": [
    "/node_modules/",
    "/test/"
  ],
  "plugins": [
    {
      "name": "common",                <----- Name of the Plugin
      "issue": "HARD_CRED1",           <----- ID of the issue
      "patterns": [
        {
          "match_type": "start",       <----- Match type can be either "regex", "start" or "end"
          "value": "foreach"           <----- The actual string to match. Base64 Encode this pattern if match_type is "regex"
        },
        {
          "match_type": "start",
          "value": "for"
        },
        {
          "match_type": "start",
          "value": "elseif"
        }
      ]
    }
  ]
}
your_rule_name.rulepack
You may either create an entirely new rulepack and add it to the scanner or you may write your own scanner plugin and add it to the framework. A sample rulepack file is a very simple JSON structure.
{
  "plugin_type": "plugin_name",   <-- Give it a name (any string)
  "file_types": [
    ".java",                      <-- Add as many file extensions, you would want the scanner to pick while scanning
    ".js"
  ],
  "rules": [
    {
      "id": "HARD_CRED1",        <-- A unique IssueID, be creative.
      "severity": "High",        <-- This can be High, Medium or Low. This would accordingly show up in the graphs in UI.
      "title": "Title of the Issue",   <-- The title of the issue.
      "description": "This text here shall be reflected in the UI as description of the issue.",        <-- The description of the issue, this is optional.
      "remediation": "The text here shall be reflected in the UI as the steps to remediate the issue",  <-- The remediation of the issue, this is optional.
      "link": "Any URL that has more resources about the issue.",  <-- URL of the issue. This is optional
      "example_insecure": "Put the insecure version of the code snippet for learning purpose.",   <-- This is optional
      "example_secure": "Put the secure version of the code snippet for learning purpose.",       <-- This is optional
      "platform_version": "all",    <-- Leave it like that
      "enabled": "true",            <-- This value enables or disables the rule during the scan. It can be either "true" or "false".
      "logic": "Explain the logic behind this rule for future updation or customization",     <-- This is optional
      "signature": "base64encode(regexp)"    <-- Write the Regular Expression of your pattern and then base64encode it to put it here.
    }
  ]
}
If you want more control or add more intelligence to your scanner rather than a simple RegExp search, you may write a quick scanner plugin like this one and integrate the script here and append the script name here. That's it. That's pretty straight forward for anyone with basic Python scripting skills.
Public/Private GitHub instance
You can use Raptor to scan your organization's private as well as public instances of GitHub by specifying the right server endpoints at here and here.
Screenshots
Login
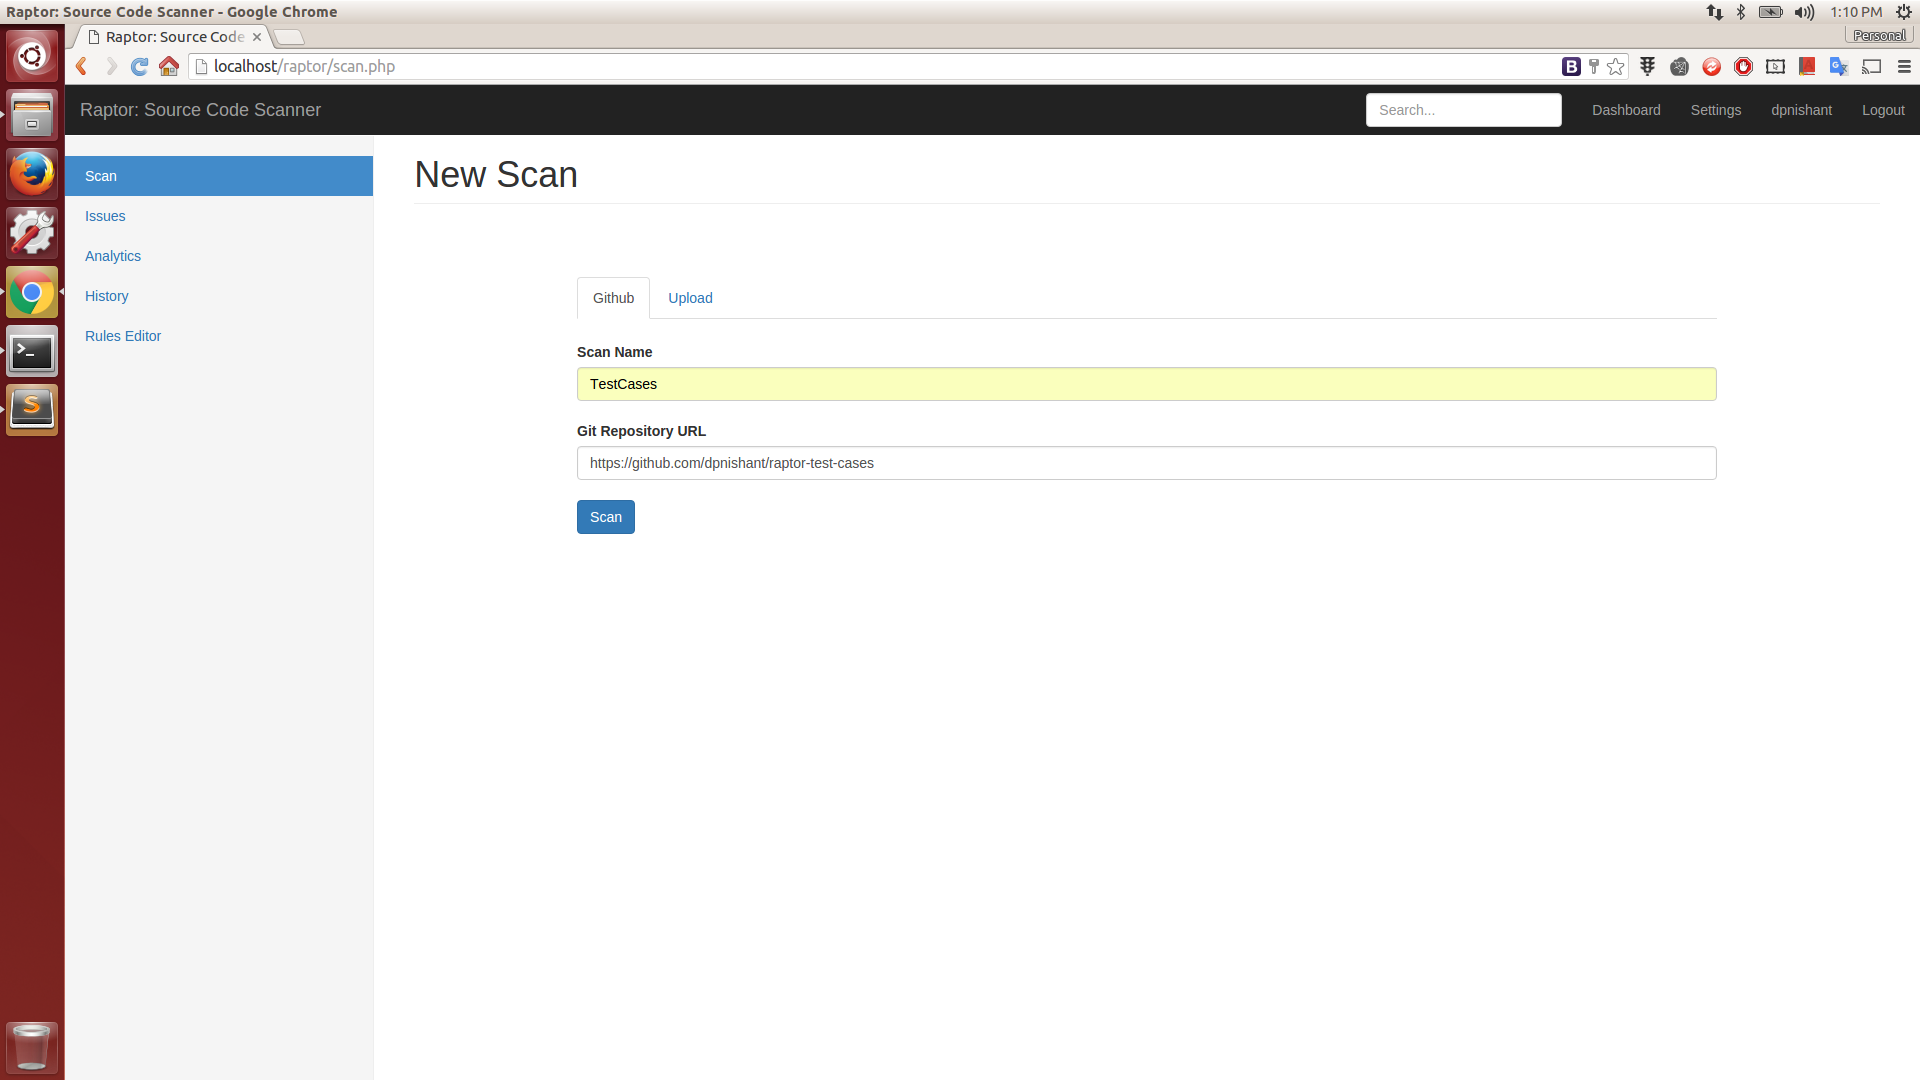
Github Scan
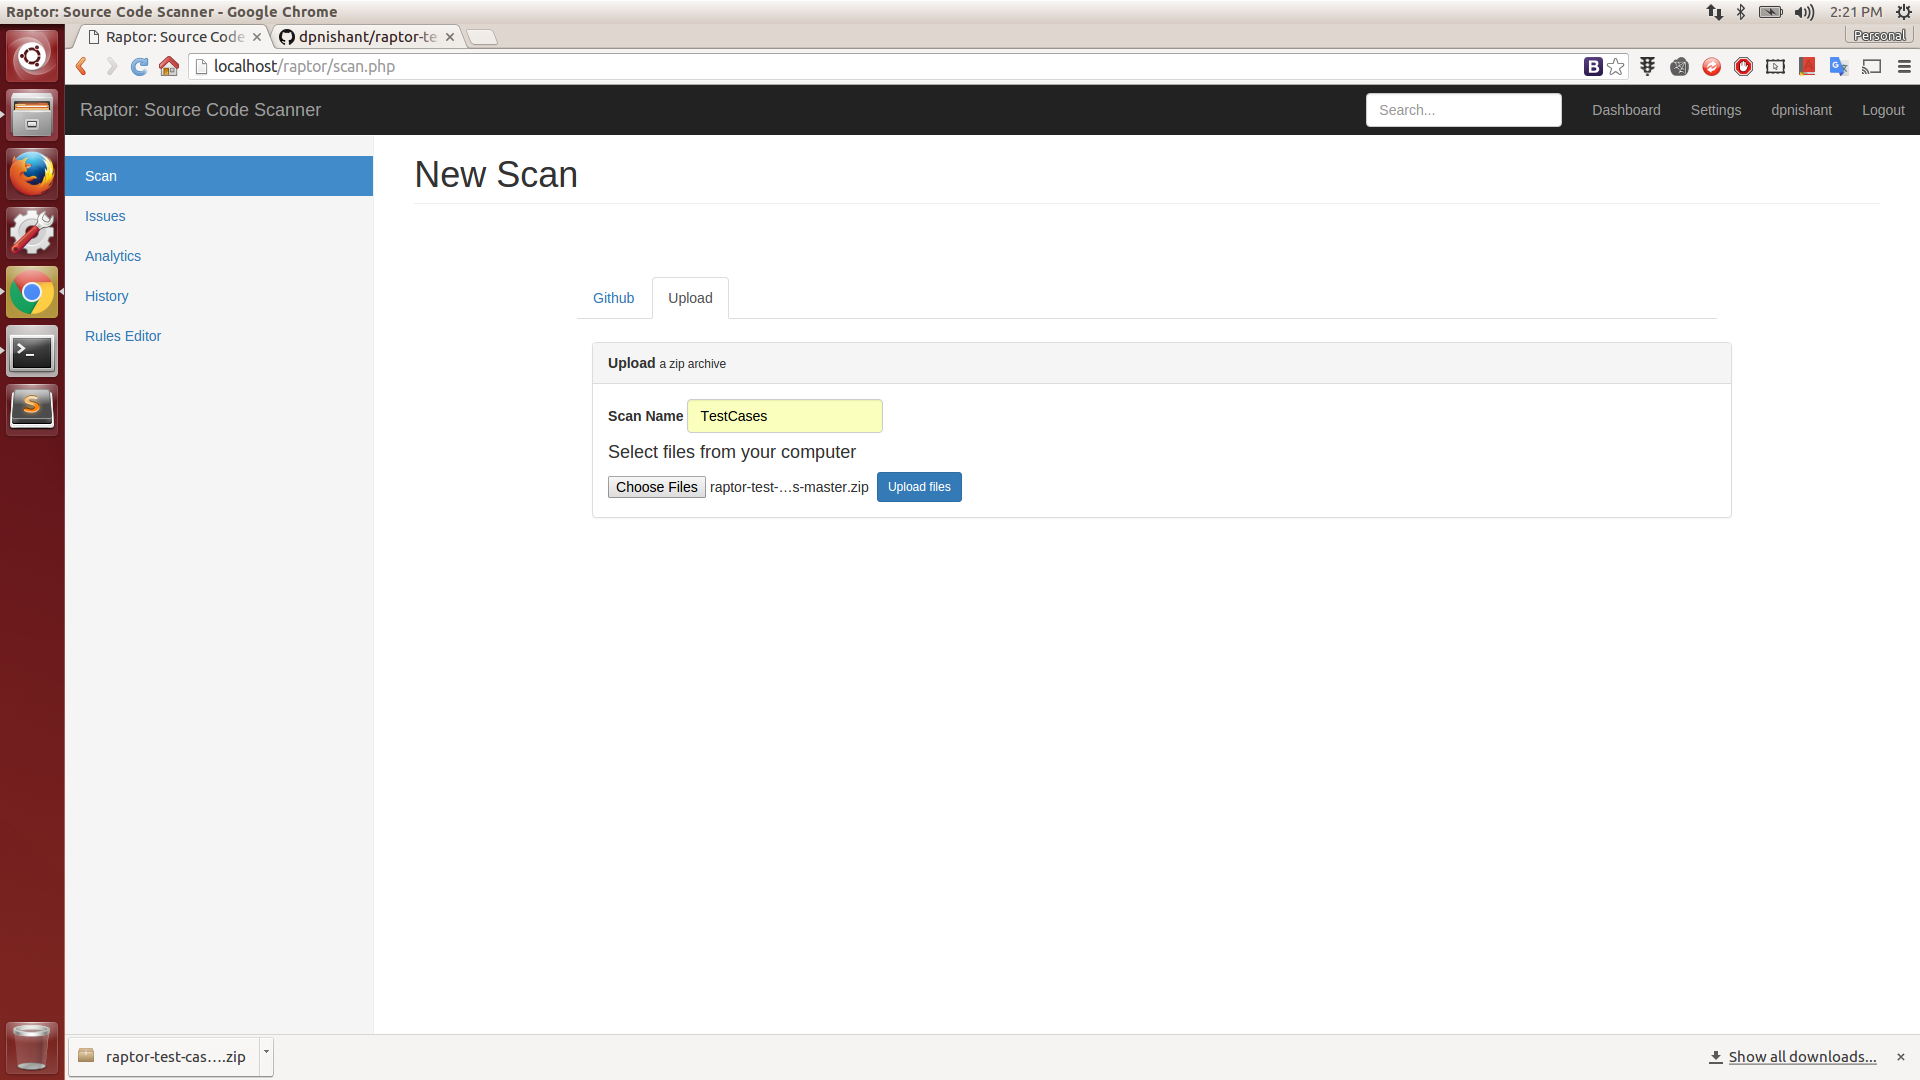
Zip Scan
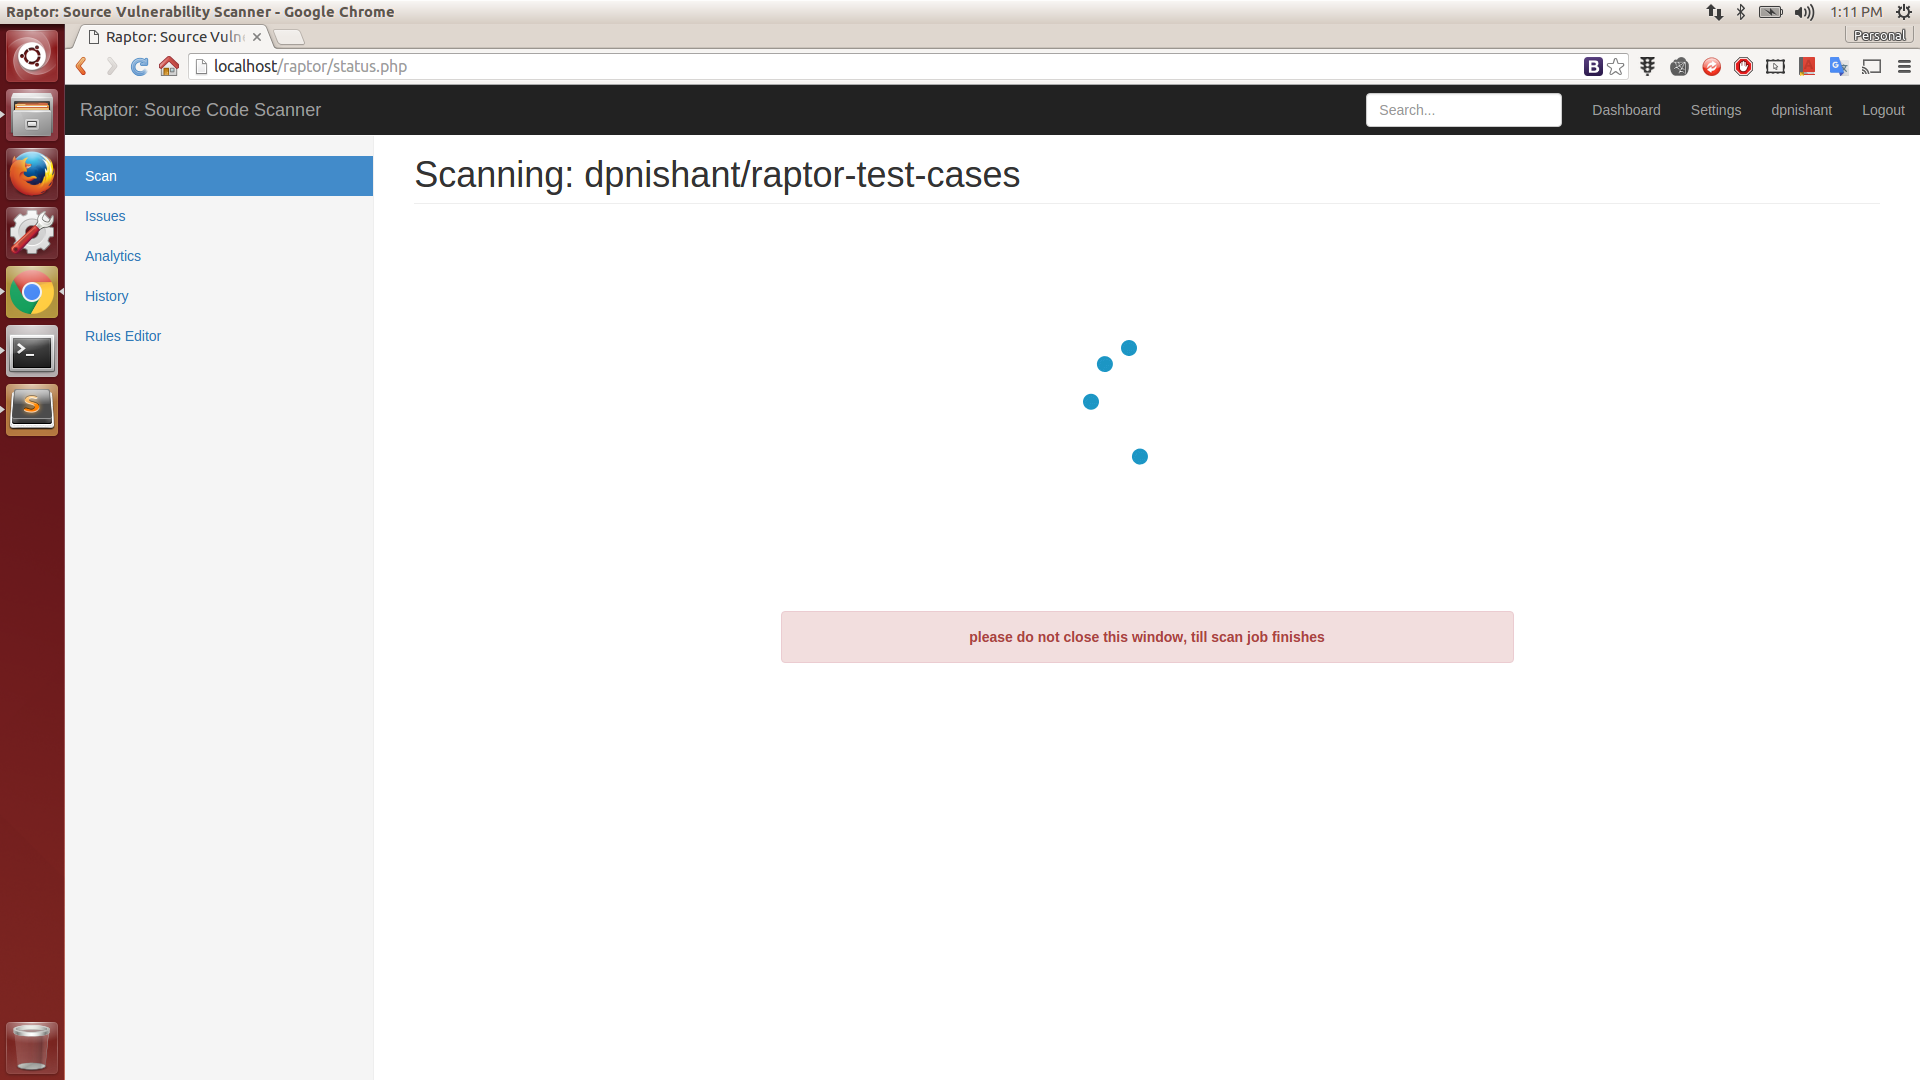
Scan Started

Scan in progress
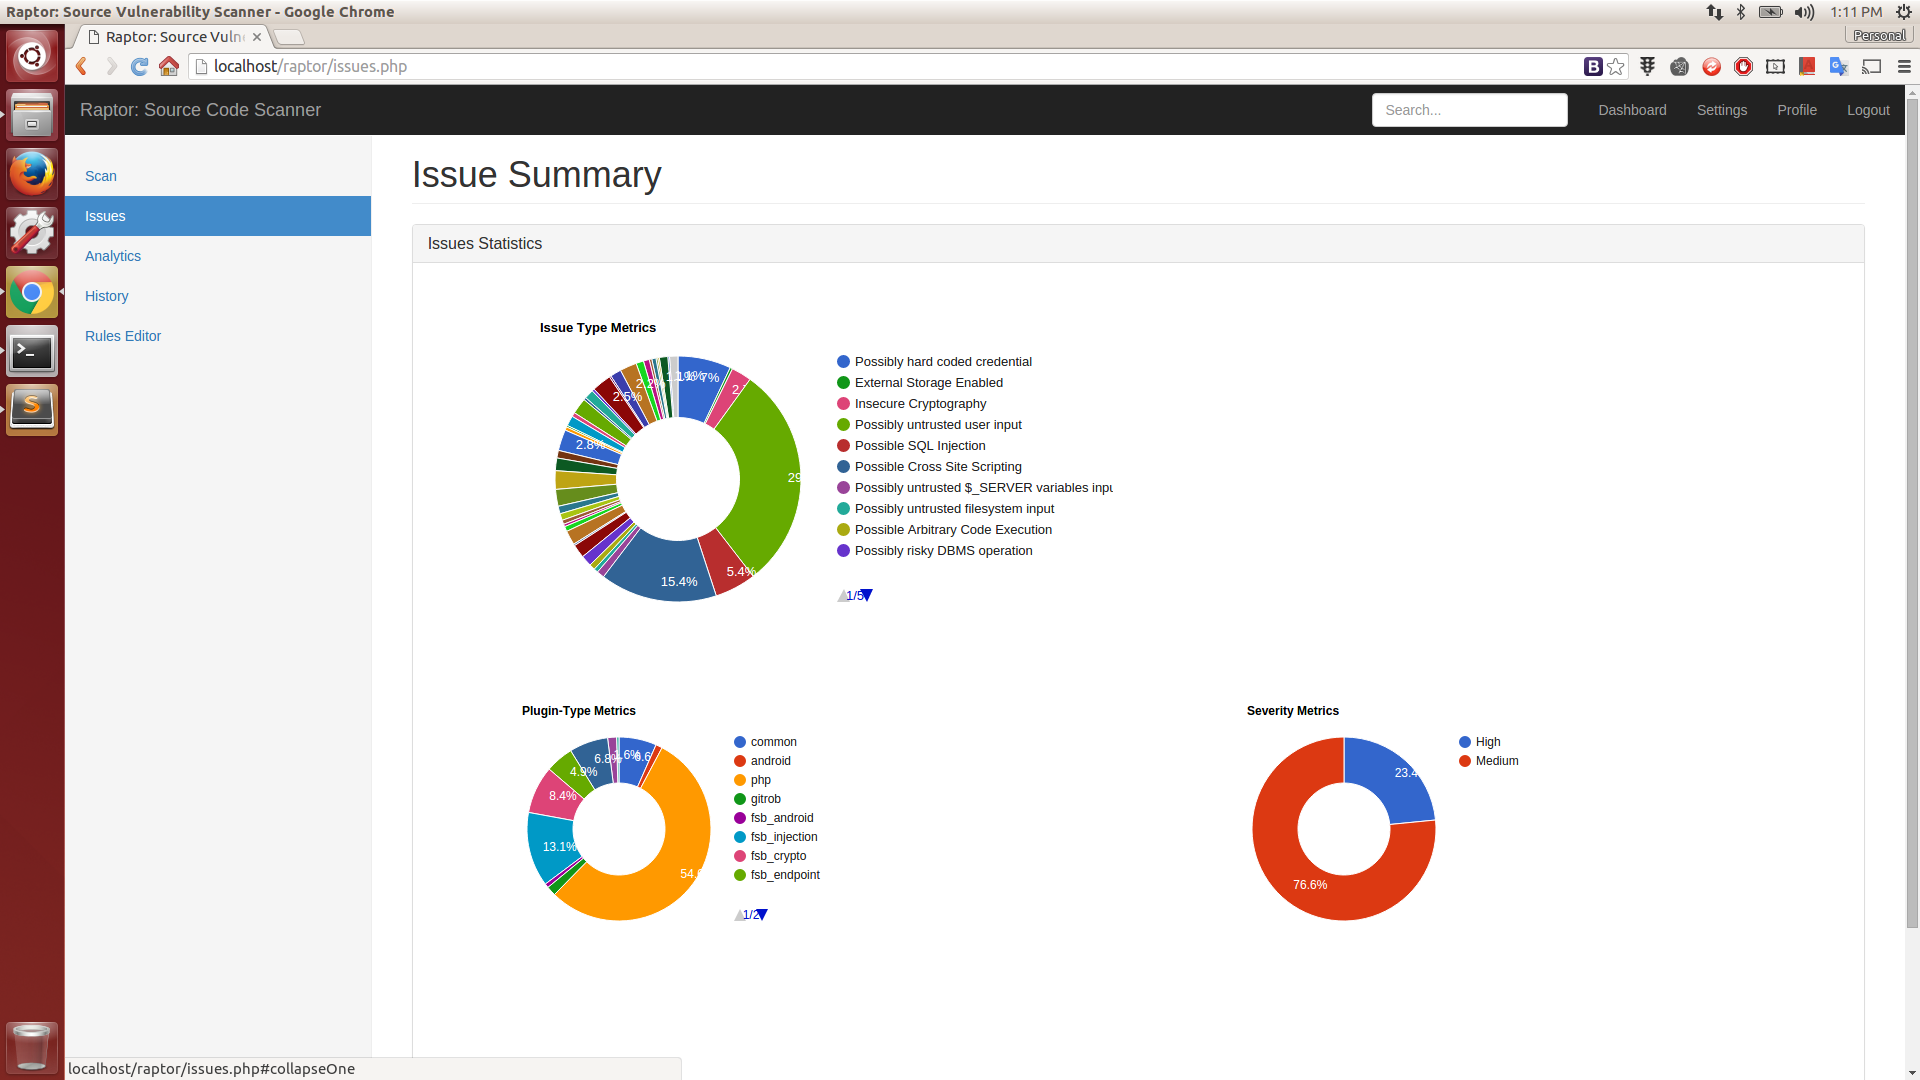
Report Statistics
Issue Details

Export Report

Scan History

Rules Editor
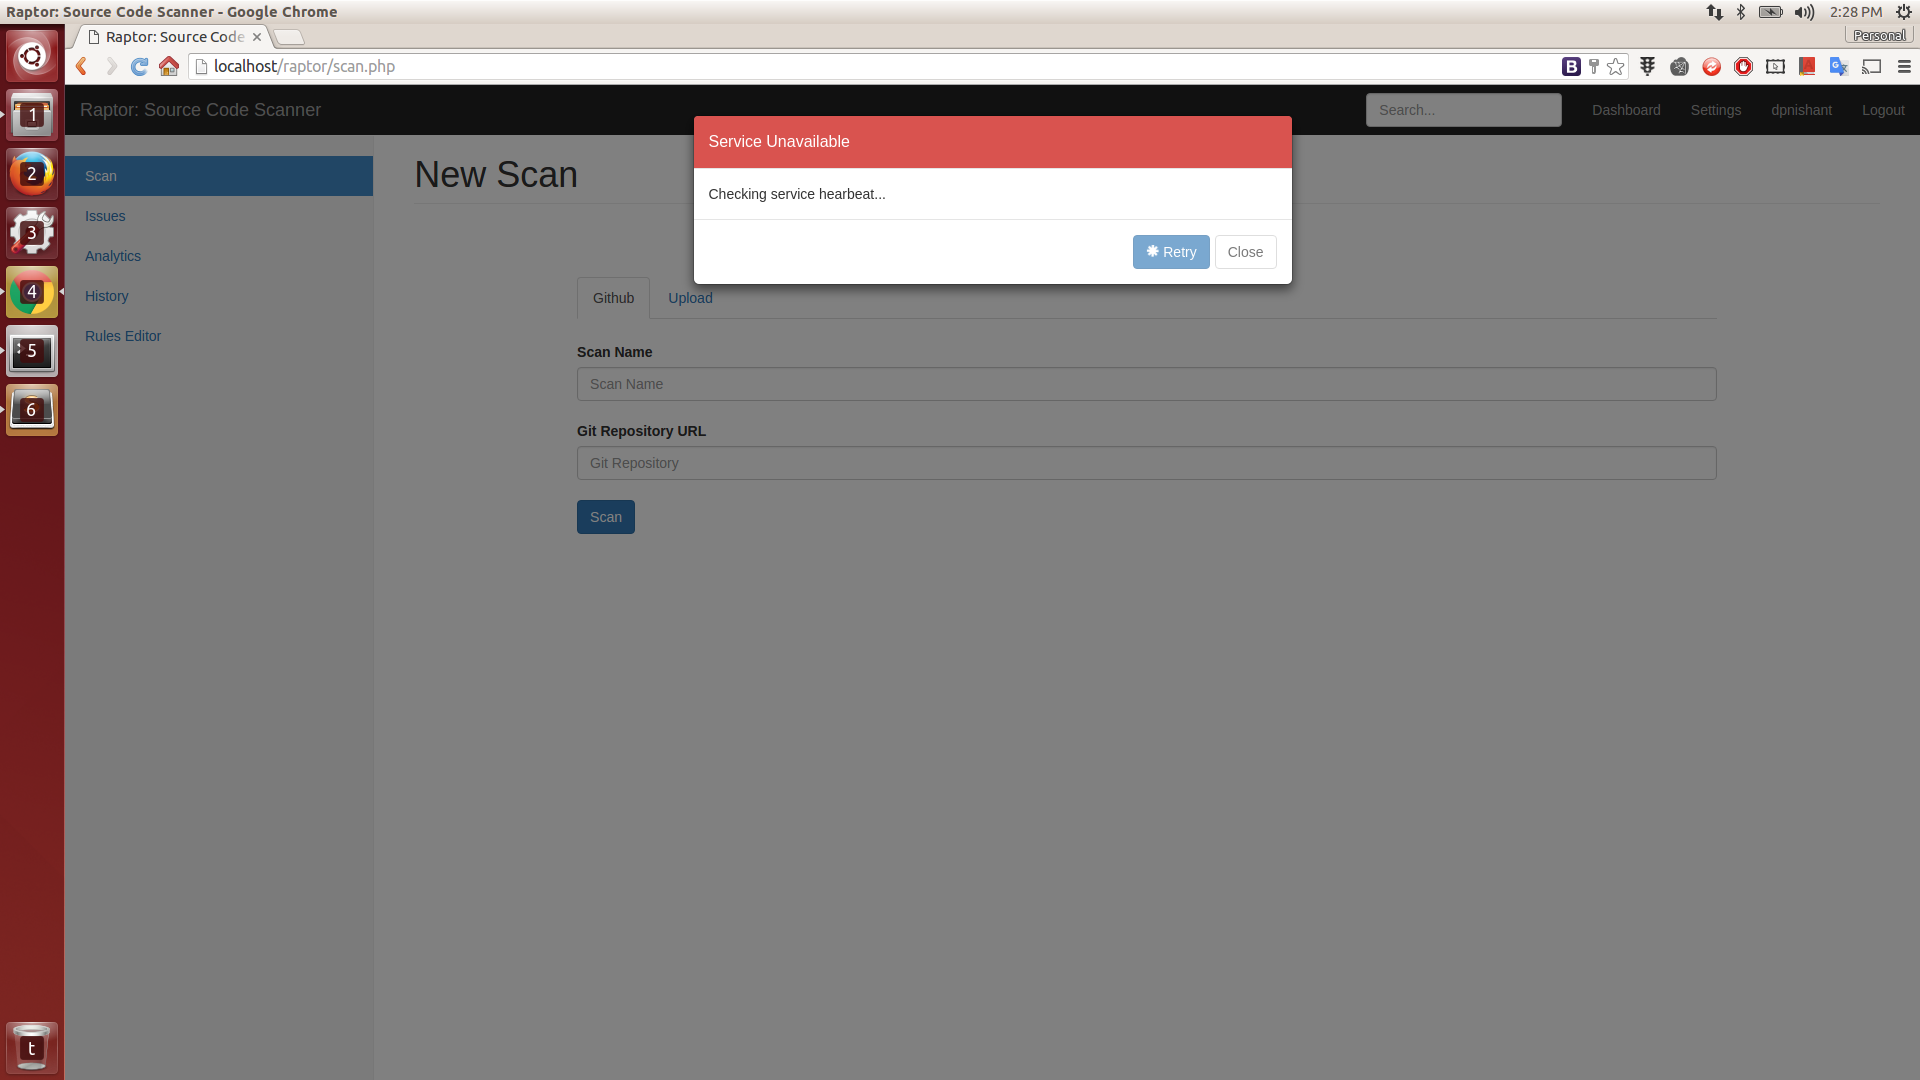
Server Error
Development
Want to contribute? Great!
Get in touch with me if you have an idea or else feel free to fork and improve.
Contributors
License
GNU GPL v2.0
Known Bugs (& Workarounds)
Free Software, Hell Yeah!